#craftingotcoding: The Anniversary Card

I've recently been really obsessed with the market street collection from my mind's eye ever since my first Crafty Card Class (I still have to do a wrap up of last month!). So when I came across the mixed media bag, I had to use it immediately!

Here's what I came up with:
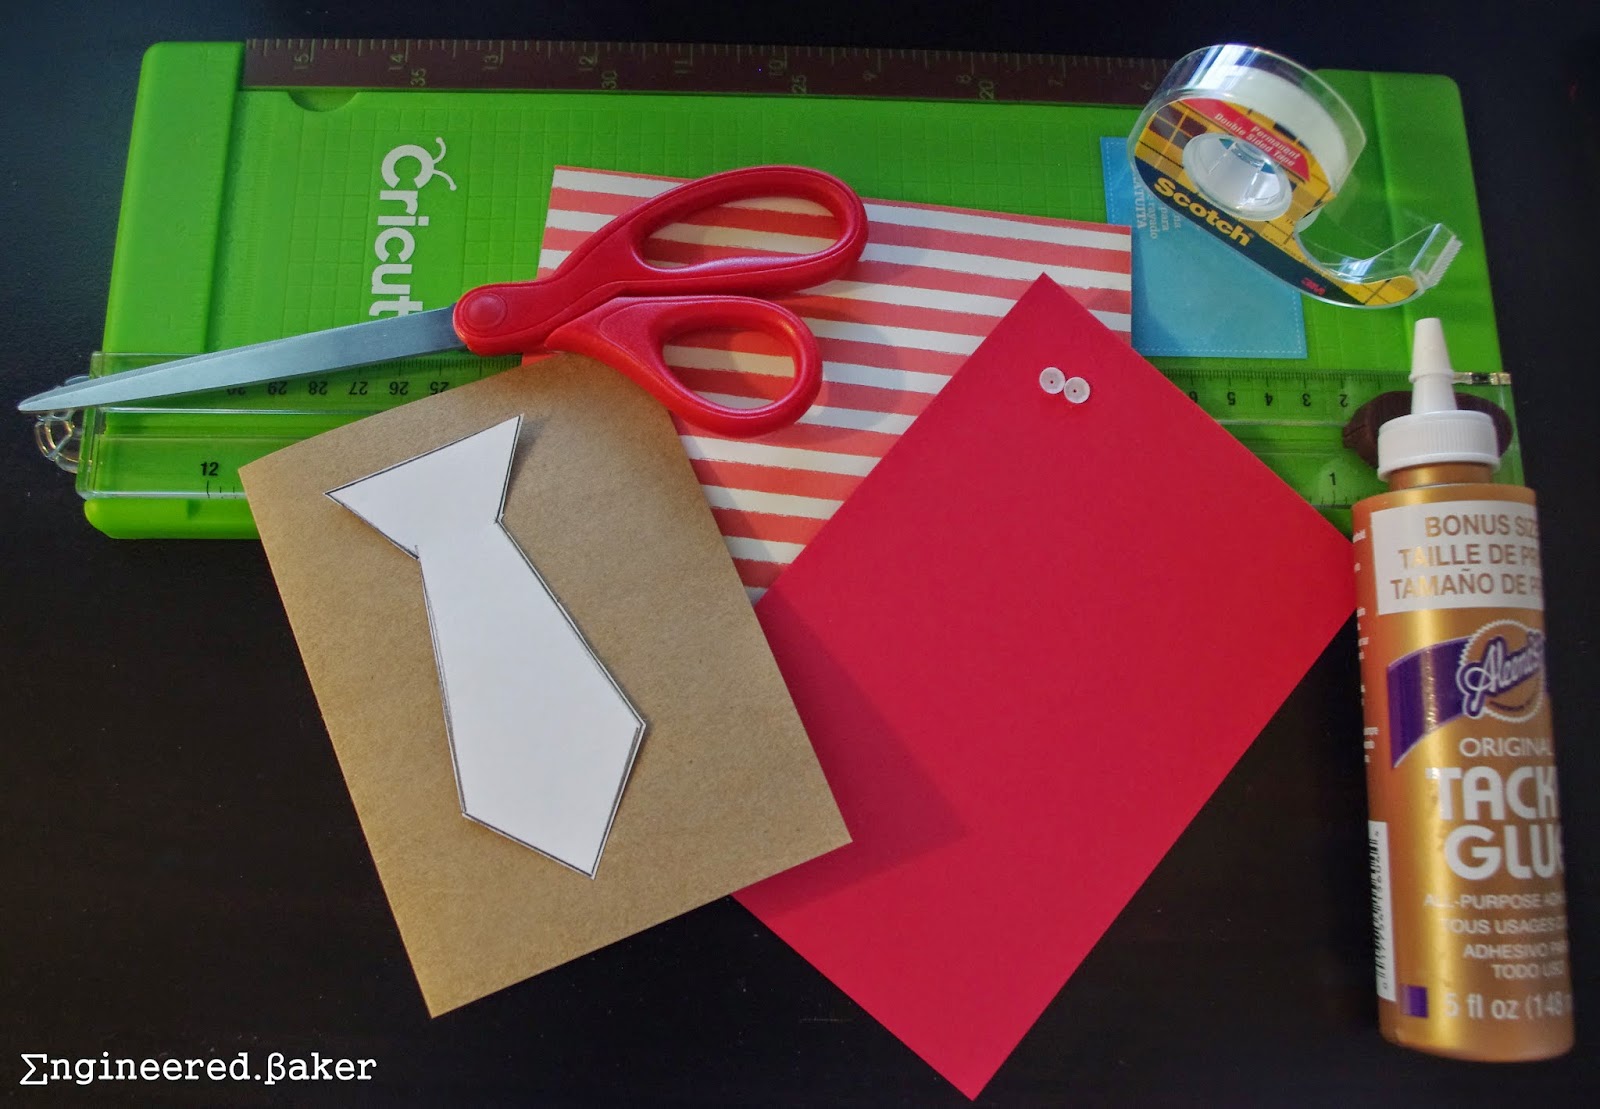

What you'll need:


- a sheet from my mind's eye market street 6 x 6 paper pad
- a few die cuts from my mind's eye market street mixed bag
- golden glitter tape
- a glitter golden heart die (punched using a heart punch, not pictured)
- kraft card base
- double sided tape
- scissors
- craft glue

What to do:
1. Trim the sheet of cardstock, so that it is a little bit smaller than the card base. Then cut off one third of the trimmed piece of paper. Stick the two alternating pieces on the cardbase. Add the glitter tape to hide the place were the two pieces meet.
2. Add a few die cuts of your choice. Since I made this an anniversary card, I added the "happy" on the front and wrote in "anniversary" inside.

Happy Crafting!
Farhana

#craftingnotcoding: The Weaved Ribbon Birthday Card

A while back Rachael at Ben Franklin Crafts showed me a really cute card. I had to try it for myself! Mine wasn't as neat, probably cause I'm not a pro like her.


But I did make a change, the ribbon I got was on the thinner than the double sided tape that I had at hand, so I used fabric glue. It was not a good idea to used fabric glue as it sticks fabrics together, not paper and fabric. Lesson learnt. I got supplies to try it again and will share an update soon.


What you need:
- 4 x 6 card
- 3.5 x 5.5 piece of cardstock, matching the ribbons
- 4 x 2 yards  of coordinating pieces of ribbon
- don't use the glue pictures, use double sided tape
- scissors
- foam dots
- sentiment stamp
- stamp pad
- glitter (optional)

What to do:
1. Weave the ribbon onto the card. This video is a good visual example.
2. Use foam stickers to add the ribbon-ed paper to the card base.
3. Stamp on your sentiment and you are ready to go!

Happy Crafting!
Farhana


Mealtime: Cajun Chicken Noodles

We are almost half way through Ramadan! Whoa, time really does fly when your busy. So busy with work and school, that this blog has taken a backseat. But I had to say yes when Lail of With a Spin invited me to her Virtual Iftar Party. I'm new at all of this, so bear with me!

Ramadan is a month of fasting, praying, reflecting and charity for Muslims all around the world. Its one of my favorite times in the year. And today I get to share it with all of you here on my blog. The key to Ramadan is fasting, not feasting. Sometimes we tend to get carried away with planning the perfect meal and forget to say an extra prayer instead. This is my first Ramadan with full time work and school, so it started off a little overwhelming, but complaining didn't change anything, so I sucked it up and am currently trying to make the best of this blessed month.


One thing that has helped me is making quick and simple meals, and getting some items premade from our local Indian grocery and Costco (yes, Costco has started carrying halal products!). With the long days, we have been merging Iftar and Dinner. Suhoor is also important when fasting, to ensure that you have a productive day. I love to have our morning meals ready to heat (my husband is awesome at setting up in the wee hours of the morning) and this one dish meal works great for Suhoor. Add a side salad and you've got dinner.


I especially love making this dish in the summer, because of all the fresh vegetables in the market. I hope that you enjoy it as much we do and thanks for stopping by my blog. Don't forget to head over to With a Spin to check out the rest of the yummy dishes that everyone is cooking up!


Cajun Chicken Noodles
Adapted from Mary's Kitchen Diaries

Ingredients

12 oz linguine
1 lb boneless chicken, cut into strips
3/4 tsp dried oregano
3/4 tsp paprika
1/4 tsp cayenne pepper
1/2 tsp cumin powder
salt and pepper to taste
1 Tbsp olive oil
1 red bell pepper, thinly sliced
1 yellow bell pepper, thinly sliced
1 orange bell pepper, thinly sliced
8 oz mushrooms, thinly sliced
1/2 large red onion, thinly sliced
4 cloves garlic, chopped
2 medium Roma tomatoes, sliced
1/3 cup milk (any fat)
1 Tbsp flour
3 Tbsp cream cheese
2 green onions, chopped for serving


Method
1. Boil the linguine according to package instructions and set aside.
2. Boil the chicken strips with a little salt and pepper. Reserve the water to use as broth later.
3. Whisk or blend the milk, flour, and cream cheese. Set aside.
4. Heat up a wok on medium high with the olive oil, and brown the chopped garlic.
5. Add in the peppers and onions and saute for a 3-4 mins.
6. Add in the tomatoes, onions and boiled chicken.
7. Add in all the spices, reduce the heat and add one cup of the reserved chicken broth.
8. Once the broth comes to a boil, add in the cream sauce and linguine pasta.
9. Reduce the heat and allow it to come to a boil. Make sure to stir properly so that it does not stick to the bottom.
10. Top with green onions before serving.

Enjoy!
Farhana 

#craftingnotcoding: The Shirt Card

Post number 25! I really need to blog more consistently :) I had this card made and pictures taken to be posted in time for father's day, but then life happened and I never got around to editing the pictures. But I did have sometime to finally get to the pictures and the good news is that you can can make it for a birthday too :)


I personally find making cards for men and boys is harder than girls, so I was really excited to see this design on pinterest.


What you need:
- Kraft (5.5x4 inch) card
- stripped 6x6 sheet of paper, mine is from the My Mind's Eye
- plain cardstock that matches the striped paper
tie template
- sequins
- glue
- paper trimmer
- scissors
- double sided tape

What to do:
1. Trim the stripped cardstock down to the size of the card. Turn it over and place the tie template in the center of the sized cardstock. Draw a line from the edge to the start of the tie, in the center of the cardstock.


2. Cut along the line drawn in step (1) and fold over from the top corners of the page to create the "collar".


3. Cut the folded triangles off. Use the cut pieces as templates and cut two triangles to create the "collars".


4. Trace the tie template on to the plain card stock and cut it out, using double sided tape attach the "shirt" to the card, then stick the "tie" on top.


5. Using glue attach the cut collars to the shirt (on top of the collar).


6. Add the "buttons" using sequins.


7. Write in a  message inside and your card is ready to send out.

Happy Crafting!
Farhana