Guest Post: Olive Oil Cake with Grapefruit Glaze

Hey all! Back, on back to back days, umm not really, today I have friend, Adeeba whom I mentioned in this post a while back, sharing a simple yet delicious treat that you can make for Eid! Who doesn't love a little dessert (or a lot) on their tables during the festivities. So please join me in welcoming Adeeba.

When Farhana invited me to write a post for her blog, I was truly honored. I know her for about 2 years and since then we have become best buddies. We always made plans before and after our school time. We planned pinterest parties on the weekends.  I can go pages after pages of crafty things we did together.  Let’s move on to the recipe now….

I saw this olive oil cake on Master Chef season 5 finale when one of the contestants baked it. I knew I wanted to bake the cake that instant. So I started to search for recipes and decided how to proceed. So here’s the ingredients, followed by the procedure.


Olive Oil Cake with Grapefruit Glaze

Adapted from Baked the Blog

Ingredients
For the cake:
3/4 cup extra virgin olive oil
2 eggs at room temp
Zest of one grapefruit
1/4 cup of fresh grapefruit juice
1 cup plain Greek yogurt at room temperature
1 cup super fine sugar
2 cups all-purpose flour
3 teaspoons baking powder 


For the glaze:
½ cup powdered sugar
1 tablespoon grapefruit juice

Procedure:
1. Preheat your oven to 350F. grease a pan of your choice and set aside. I used a springform pan here but you can use whatever pan you like.
2. Separate the eggs into whites and yolks.
3. Sift together the flour, baking powder and salt.
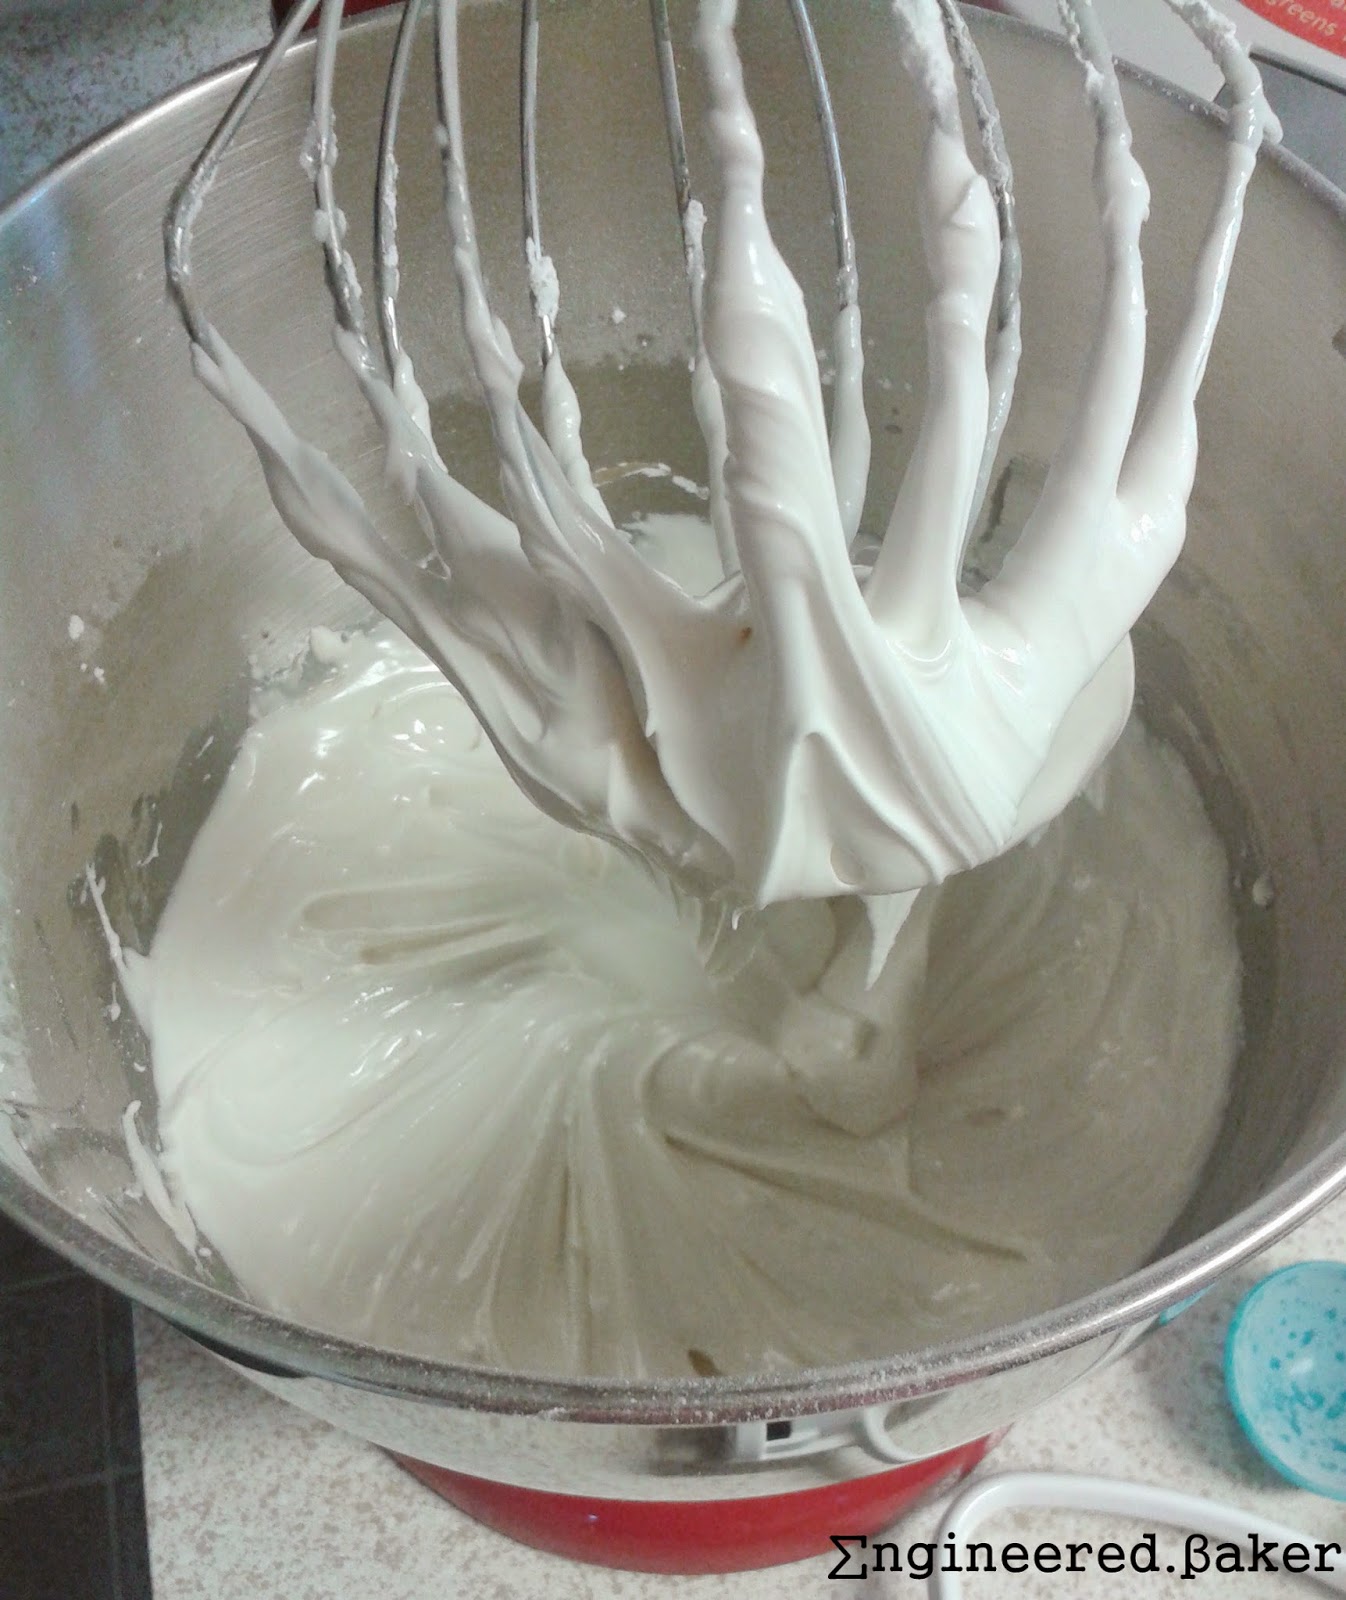
4. Now in a clean bowl beat the egg whites with a whisk attachment until soft peaks form. Then add ¼ cup sugar to the whites and beat until stiff peaks form. Put the whites aside in a bowl. 
5. Now beat the oil and sugar together for about a minute. Add the yolks and beat in for another minute.
6. Beat the vanilla, juice, zest in the yolk mixture. Add the yogurt and flour. Keep beating until everything is mixed well.
7. Lastly add the egg white and fold it in the flour mixture with a spatula. Do not over mix it.
8. Pour the batter in the pan and put it in the center of rack of the oven.
9.   Bake for about 30-35 minutes until a toothpick comes out clean.

After getting the pan out of the oven put it on a cooling rack. Try taking the cake off the pan after it has cooled slightly. 


After the cake has cooled completely, it is time for the glaze. Mix together the powdered sugar and the juice until a smooth paste forms. Now with a fork or hand whisk, put the glaze on the cake. After that you can do any decoration you want, I did a simple design with princess edition jelly beans.


Enjoy this olive oil cake and keep reading Farhana’s blog :)
Cheers!!!

Adeeba 

Thanks for sharing Adeeba! Hope you come back with more treats soon :)

Enjoy!
Farhana

#craftingnotcoding: Eid Banner

I really didn't mean to be away for so long, but took me a little longer than expected to get back in track after vacationing (why can't life be all vacation and blogging!). Now that I am back at school, the posts will be less than the past few weeks, but I'll do my best to maintain some sort of schedule!


With Eid coming up, a lot of this weekend for me was making grocery list, cleaning out the freezer and making a menu. But first things first, a little decor for the house, and what's better than a banner from the die cut center at Ben Franklin Crafts and Frames.


The number of sheets you'll need depends on the number of characters in your banner. Use the table to figure out how many sheets you need to get.

Shape
Die cut Number
Paper Size
Number of die cuts
Pennant
SJ25
12 x 12
2
Pointy Edge Circle
157
12 x 12
9

I used (all 12 x 12)
- 1 purple sheets
- 6 blue sheets
- 2 yellow sheets.

you will also need some
- glue
- matching ribbon
- tape

the dies you use are
- pennant = SJ25
- circle = 157
- 2 inch "shout out" letters

What to do? Easy, just die cut and then glue the layers together. Once the glue has dried, stick the ribbon on to the inside of the folded pennant, using tape to string the banner together.

(Don't know how to die cut, the ladies at Ben Franklin are super helpful and are always glad to show you how!)

Happy Crafting!
Farhana    

#footballsunday 3.0 : Seahawks 'Skittles' Brownie Bites

Yes, its Tuesday. I got so wrapped up enjoying the weather this weekend, I just couldn't get my self to sit down long enough to write up this blog. But better late then never, right? But now you have enough time to make it for next week's big game against the Broncos.


This week I decided to make some brownie bites with this recipe, topped with some cream cheese icing and skittles. If your a Seahawks fan, then you know the significance of skittles :)


These brownie bites are made with my favorite basic brownie recipe baked in a mini muffin pan. The cream cheese icing is tinted into colors, blue and green and then piped on to the brownies using a wilton 2D icing tip.


Once the icing was tinted, the piping bag was filled with both colors to create the two toned effect. Top with a skittle and you set!


Seahawks 'Skittles' Brownie Bites

Ingredients
1 batch the basic brownie, bake in a mini muffin pan

1 (8 oz) package cream cheese, at room temperature
1 stick (1/2 cup) butter, at room temperature
2 cups powdered sugar, sifted
green and blue food color

skittles, I picked out the blue and green from the packet

Extra Tools
blue and green mini cupcake liners
Wilton 2D icing tip
piping bag

Method
1. Bake and cool the brownies in the liners.

To make the icing:
2. Beat the butter using an electric mixer, for about 5 mins. Scrap the edges using a spatula.
3. Add the cream cheese to the butter and continue to beat the mixture until completely incorporated.
4. Slowly add in the powdered sugar, scraping the sides of the bowl after every addition.
5. After all the sugar has been added, beat for another 1-2 mins.

To Decorate:
6. Divide the batter into two bowls and color one batch blue and other green.
7. Attach the 2D tip to a piping bag, then fill half of it with green and half with blue icing.
8. Pipe the brownie bites and top with skittle.

Check out the new page I created for more football themed desserts!

Go Hawks!
Farhana

Eating Healthy: The Mediterranean Veggie Sandwich

Hope you all had a good "football" weekend! This is the time of year for me when I plan all my weekend activities around the Seahawks schedule, let's just say I'm one wife that's not complaining its football season.


My one and a half weeks of summer break started Friday night, and I have been enjoying every single moment of it! Really not at all looking forward to classes starting, especially as I don't know if I'll be able to keep up the blogging (oh yeah I have my priorities in place, blogging > school, unfortunately job pays more than blogging, so school it is).


School season at home means lots of packed lunches and quick dinners, and this sandwich is perfect for both! Its quick and easy, and above all healthy. I'm not one for counting calories, but if you are this will probably be on the lower end :) And just like any sandwich it is easily customizable, you can add or remove ingredients according to personal taste.


So go ahead, make it, pack it and take it along on a picnic to enjoy the last days of summer! (Don't worry, no fall, pumpkin or cinnamon recipes till Sept 22, I'm all about enjoying every last min of summer!)


Mediterranean Veggie Sandwich

Ingredients
sliced bread, I used whole wheat
hummus
feta cheese
roma tomatoes, sliced
cucumbers, sliced
baby spinach
chips, optional for serving

Method
1. Spread hummus on one side of two slices of bread.
2. Add vegetables (as much or as little as you like) to once slice of bread.
3. Sprinkle feta cheese on top of the vegetables and cover with second slice of bread.
4. Wrap it up for lunch or serve immediately with a side of chips.

Enjoy!
Farhana

#craftingnotcoding: The "die cut flower" Anniversary Card

A few weeks ago my crafter friend, A sent me a care package with a lot of die cuts! She knows me too well! As soon as a got a chance to craft, I used them to make this anniversary card for my sister in law. Here's what I came up with :)


What you need:


- 4 x 6 card base
- die cuts using this
- glue
- pens
- stamp and ink, optional

What to do:
1. Use glue the diecuts on to the card base in a pattern you like.
2. Glue the flower with the stem on the inside, write "Happy Anniversary".
3. Stamp the back to take credit :)
4. Mail it out!
Happy Crafting!
Farhana

Decorating Cookies Basics Part 2: Royal Icing

So I've been on this high of posting regularly, but it's been a lot of crafting, fear not, I didn't forget about all my baker readers! As most of you remember a while back I shared my favorite cut out cookie recipe with a glimpse of a possible way to decorate them. Today I'll walk you though making a batch of royal icing.


Before we get started, I thought that I would share a few little things that I have learnt over the past few years about decorating cookies. I am not an expert and everything that I learnt is through trial and error. I did take a flow cookie decorating class a while back with a few friends at a local cake supply store, and learnt a few thing there too.


So, here's what you DON'T have to do or get to make royal icing:
1. You don't need to have a separate mixing bowl or mixer attachments. Just make sure that they are well washed and wiped dry.
2. You don't have to buy the fancy, expensive meringue powder, Wilton brand work perfectly for me.
3. You don't need to splurge on $3 icing nozzles/tips, and their decorating bags are great , just use the Wilton brand.


What you should DO is watch/read this links before getting started, I saw no point in me describing what's already out there on the internet (it would be like reinventing the wheel):
1. Cut down clean up time by using this technique from Karen's Cookies, watch here.
2. Check out a 101 from Bridget of bakeat350, here.
3. Lastly check out SweetSugarBelle, she is the queen of cookies, literally!


Now, here's my recipe.

Royal Icing
Adapted from Joy of Baking

Ingredients
2 cups icing/powdered sugar, sifted
1 1/2 Tbsp Wilton meringue powder
1/2 tsp vanilla extract
1/4 - 1/2 cup water

Extra tools:
cling wrap
airtight container, for storing
gel food color
icing bag and tips

Method
1. Add sifted sugar and meringue powder to the bowl of electric beater. Mix for 30 secs.
2. Add in 1/4 cup of water, beat until well mixed. The mixture will be dull and very thin in consistency.
3. Continue to beat on medium high until the mixture is stiff and glossy. (Just like stiff beaten egg whites, the royal icing will hold peaks.)
4. Fold in the vanilla extract.
5. At this point the icing will be very thick.
6. Transfer the icing to an air tight container and cover with cling wrap, stores in a fridge for weeks.
OR
7. If you want to decorate the cookies as shown above, add color of your choice to a small batch of the icing. Then thin the icing down to "piping" consistency.
8. Fill a icing bag set with a Wilton #3 icing tip.
9. Pipe away and add a few silver sprinkles of detail.
10. Allow the cookies to dry for 2-3 hours before packing or serving.

(I know snowflake cookies in summer!?! Well with the FROZEN craze going on, these might just be the perfect addition to your party!)

Enjoy!
Farhana

#craftingnotcoding: The Crafty Card Class [August 2014]

As I mentioned at the end of July's wrap up August was Rachel's last craft card club at Ben Franklin crafts and frames. I'm going to miss talking to her and getting crafting ideas when I'm at the store.


Just like July, I didn't get to go to the class because of work, but I got to go in the evening and take pictures to share with all of you!

Here's what she came up with this month...

1. The "bling-y" Card
So simple and so easy! Just card stock and rhinestones!


2. The "Circles" Card
Little more complicated, but that just makes it cuter! I can't wait to try it for myself!


3. The "Reindeer" Card
Never to early to start getting those Christmas cards made. I just love the ribbon!


4. The "Vintage" Card
If you thought last month's card with the photo corners was cute, this is even better cause you get to make the corners yourself! (Any notice the use of the doilie??)


5. The "Sprinkles" Card
I named it this cause the paper reminds me of sprinkles! You can easily change the sentiment to match your occasion.


That's a wrap for August's class, I hope that you are inspired by these! Now that I have caught up, we all have to wait for September's class. Rachel spoke very highly of Coleen, and I can't wait to see what she comes up with!

(please check out other card ideas on the blog and stay tuned for tutorials for these cards!)

Happy Crafting!
Farhana   

#footballsunday 2.0 : Seahawks "12" Fondant Cupcake Toppers

I hate the fact that commentators refer to Russel Wilson as a "rookie quarter back" and keep reminding us that he is a third round pick. Come on! He won the Superbowl! As I was telling my husband, the commentators are like brown parents who will always remind you of that one thing that you did wrong, for the rest of your life!


Anyways, enough with the ranting...We won our first home opener against the Greenbay Packers (one down, lots more to go!). This weeks treat was vanilla bean cupcakes with vanilla bean frosting (recipes coming soon!) with "12" fondant toppers.


I had A LOT of leftover fondant from a baking project (that's a story for another day). And it happened to be blue, white and green!


Enough chit chat...here's the details. This are super easy to make, I had the cupcakes in the oven, the frosting running on the kitchen aid and I cut these out while watching the game. Not a fan of fondant?


Not a fan of fondant? Well there are other treats that you can make for game day, check them out here.
Seahawks "12" Fondant Cupcake Toppers


Ingredients
blue, green and white fondant
fondant roller with 1/16th inch markers
circle cookie cutter
"1" and "2" cookie cutter
wax paper
plastic mat (for rolling)


Method
1. Roll out about a 1/4 cup of blue fondant (using smaller amounts of fondant helps prevent drying out and cracking). Using the circle cookie cutter, cut out circles and transfer to a sheet of wax paper. Repeat for half the number of cupcakes you will be decorating.
2. Do step (1) using the the green fondant this time.
3. Now roll out white fondant use the "1" and "2" cookie cutters to cut out your "12"s, cut out enough for your circles. Immediately transfer the "12"s on to the circles nd press down lightly to get them to stick to the circles.
4. While your cupcakes cool, allow the toppers to dry out a little bit. Once you have frosted your cupcakes, add the toppers and you are ready to watch the game!

(If you wish to store the toppers for future use, allow them to dry over night, then store them in an airtight container, separating them using wax paper.)

Go Hawks!
Farhana

#craftingnotcoding: The Weaved Ribbon Baby Card (Redo)

A couple weeks ago I shared a messy card, where I tried to create a design by weaving ribbon, as promised, I redid it. This time using double sided tape, not only was it MUCH neater, it was so much easier and less messy!


What you need:


- 4 x 6 card
- 3.5 x 5.5 piece of cardstock, matching the ribbons
- 4 x 2 yards  of coordinating pieces of ribbon
- double sided tape
- scissors
- foam dots

What to do:
1. Weave the ribbon onto the card. This video is a good visual example.
2. Use foam stickers to add the ribbon-ed paper to the card base.
3. Add a personal message and your set to visit a baby.

Happy Crafting!
Farhana

#craftingnotcoding: The Crafty Card Class [July 2014]

Yes I'm still playing catch up, but better late then never, right? Unfortunately because of work I was not able to go to the July crafty card club at Ben Franklin Crafts and Frames, but Rachel was really awesome to let me take pictures of her card creations so that I would be able to share with all of you!


What an assortment of cards she made! So hard to choose a favorite!

1. The "Washington" Card
How cute is this card! And so simple :) 


2. The "Ruffles" Card
I love the ombre effect she did on this one! And how cute is adding the border to a stamped sentiment!

3. The "Sun Burst" Card 
This card makes me smile. I love the sun burst effect along with the papers!


4. The "Circle" Card
This one reminds me of a card from the first class I ever took of Rachel's, except this time instead of layering, she added dimension with pop dots.


5. The "Window" Card
This card is not as complicated as it seems from the picture. The best part is that the message is held on inside the using photo corner, so you can "hide" a gift card in there (Rachel thinks that someone might miss their gift if they don't look hard enough, what do you think?)


That's a wrap for July's class, hopefully these were an inspiration to you. I'll be back in a few days with her last crafty card club meeting at Ben Franklin :( so sad to see her go.

(please check out other card ideas on the blog and stay tuned for tutorials for these cards!)

Happy Crafting!
Farhana

The Anniversary Cookie Cake

Happy Anniversary to my best crafter friend! Ever found a friend that makes you think that you are looking into a mirror, well I did :) But then she moved :( So on her anniversary I don't get to bake her a treat, so I'll send her a virtual one!

Don't you think that cookie cakes are so cute? And one can never go wrong with sprinkles! This "cake" is so simple to make, take minutes to cool and leaves an impression! 


Don't have an anniversary coming up? Fear not, just change the message and sprinkles to that of your choice. What ever the occasion, you can never go wrong with a cookie cake. Go ahead make one soon! Trust me its good!

The Anniversary Cookie Cake

Ingredients
1 batch shortbread cookies
white frosting and sprinkles, for decorating

Extra Tools
wax paper
rolling pin
baking trays and cooling racks


Method
1. Preheat oven to 350*F.
2. Prep dough according to recipe.

3. Fold in sprinkles to mixture.

4. Roll the dough between two sheets of the wax paper, to about 3/4th of an inch thick, you should get about a 12 inch circle.

5. Remove the top wax paper sheet and transfer the cookie to a baking tray.
6. Bake for 15 - 20 mins, till the edges start to brown.
7. Place the baking tray on the cooling rack and allow the cookie to cool on the tray.
8. Once the cookie has cooled, transfer to a serving dish.
9. Pipe you message, add some more sprinkles and your set!

happy anniversary A & N!
Farhana