#craftingnotcoding: The Pink and Grey Banner


If you have been following my blog or Instagram you have figured out that I have an obsession with paper. The only thing that I like as much as paper is once it comes to crafting is the die cut center at Ben Franklin Crafts and Frames. Their die cut center is great for making banners! I look for any excuse to make a banner. I have two designs spinning in my head as I type this, so make sure to follow along so that you are the first to know when I post about them here :) 

This one was for a sweet little girl, whose aunt is a friend and and her mom also happens to be a blogger friend of mine, she blogs over at With a Spin. My friend chose the design for the banner and we headed over to BF (Ben Franklin) to match papers and start die cutting. It was so much fun crafting together and getting someone else hooked on die cutting too!

If you are one of my local readers, head over to Ben Franklin to create a banner with a personal touch for your next occasion, let me know if you need any help, I'll be there to join you!

To create this banner you will need : 
- grey, chevron, polka dot and pink paper
- pink tulle
- grey ribbon
- pop dots
- small circle hole punch

The die that were used are 
letters = 4 inch
small heart = 235
small scallop = 454
large scallop = J168
large circle = J55

what to do:
1. Die cut your shapes and letters.
2. Stick them together using pop dots.
3. Punch holes in the individual pieces and tie them together with a piece of tulle and a piece of ribbon.

Check out some other banner ideas here and here.

 Happy Crafting!
Farhana   

Don't forget, caring is sharing!

Paper Mania {February}

Its my 100th post! Wow, considering how rarely and irregularly I used to post when I started my blog, I'm surprised it took me just 3 years! I hope that I can keep blogging and sharing my 2 cents with the world :) As you all might have noticed, what started as a baking blog, has now become a place where I ramble about pretty much everything that happens in my life (hope I don't bore you guys TOO much). One of the things that I ramble about it crafting, paper crafting to be specific! And to fuel my obsession I can always show up at Ben Franklin! I recently joined their Paper Mania meetings, and now get to find out about more products and techniques to enable me :D


For February, there were sample papers from My Mind's Eye's Hello World collection. The theme for the year is "you", leading to this months tasks :
- create something using the samples provided (scrapbook layout or cards)
- create a bucket list
- print pictures
and the techinique taught was embossing using an embossing marker.

Using what I was given I created the following scrapbook layout.


I made the layout before spring break, so I'm going add the pictures after I get back :)


After the scrapbook page, I was staring at the leftover paper and the card maker in me thought a little punching and washi tape could work wonders :)


I used some colored cardstock and card base from my stash, added a little glitter washi tape from Pick Your Plum and butterfly punch outs from Martha Stewart. I added a little dimension using foam tape to lift the butterflies.


These cards were so easy that I ended up making a bunch! It really is a great way to use up scraps!


This card was made using the tag from the technique take n make during paper mania. Detail about it can be found here.


And I decided to make my bucket list in my smash book (no laughing :P)


Lastly, I printed me some groovebooks :D


Happy Crafting!
Farhana   

Don't forget, caring is sharing!

The Chocolate Chip Cookie

I've been blogging on and off for almost two years  now, but I haven't shared a chocolate chip cookie recipe. Hard for me to believe as I make them ever so often, as they are my husband's all time favorite dessert. I try to make them for him every couple of weeks, he would love it if I made them every week, but I'm a baking blogger, I have to experiment with other dessert here and there too :)


I thought that today would be the perfect day to finally share my go to CCC (chocolate chip cookie) recipe as I am not home to bake my husband a birthday treat :) Happy Birthday! (I'll bake something as soon as I get back :) )


I like to chill this dough for hours before baking to get the puffy cookie shape and also make sure to bake it till the edges brown and the center is slightly soft, leave it on the pan and it will harden as it cools. My CCC experiments yeild cookies as hard as rock, spread out like cake batter and almost as chewy as toffee. But finally have a go to recipe and its an easy one!


One more pointer, don't use a hand/electric mixer to beat the dough, it incorporates too much air into the dough, causing the cookies to rise and spread too much.


{UPDATE : here's what my husband had to say after reading this :
You don't try to make them every couple of weeks. But like every couple of months. . I also would prefer you don't make them more than every couple weeks cause then I would have no room to enjoy all the other delicious goodness you create! Lastly, where is my credit on helping you get this recipe right? 
The Chocolate Chip Cookie

Ingredients
1 3/4 cup all purpose flour
1/2 tsp baking soda
12 Tbsp (1 1/2 sticks) unsalted butter, melted
3/4 cup packed dark brown sugar
1/2 cup granulated sugar
1 egg and 1 egg yolk
2 tsp vanilla extract
1 1/2 cups semi sweet chocolate chips
3/4 cup chopped walnuts or pecans, optional

Method
1. Stir together flour and baking soda, set aside.
2. Melt the butter and whisk in both the sugars by hand, until the mixture is well combined and smooth,
3. Add the whole egg, then the egg yolk and continue beating until combined. Add in the vanilla extract.
4. Lastly fold in the flour mixture, then the chocolate chip (and nuts, if using), mixing until the flour is just incorporated.
5. Cover the bowl and place in the fridge for at least 30 mins up to a day.
6. Preheat the oven to 350*F. While the oven heats up scoop the cookie dough into small balls using a cookie scoop and place 1 inch apart on a cookie sheet lined with parchment paper. Keep the remaining dough chilled as the cookies bake.
7. Bake for 8-10 mins depending on your oven, or until the edges of the cookie are sightly browned and the center is still soft.
8. Cool the cookies on the tray for 5 mins, then move them on to a wire rack.

Note : cookies can be stored at room temperature for upto 5 days in a airtight container. The cookie dough can be frozen.

Enjoy!
Farhana

Don't forget, caring is sharing!

The Biscoff Double Chocolate Bread {and a Book Review}

Heard of Biscroff? No, then stop reading right now, head over to the grocery store, get some, then come back and continue reading. Trader Joe's sells a similar spread called cookie butter, and I must say that it is good...really good! They also have a cookie/biscuit that is served on Delta flights, so good!


I first had the cookie, then the spread and I am in love. Its a great alternative to peanut butter, especially if you are baking for someone with allergies or just don't like peanut butter as much! I really wasn't a fan, but I've grown to like it :)


The best type of recipe book in my opinion is when you a want to make every single recipe in the book! I think I need to order a bulk pack of biscroff from Amazon to make my way through the book! I first made the banana biscroff bread, which you might have noticed if you follow me on Instagram, then I decide to give the chocolate-biscroff bread a try, with a little twist of my own of course!


I baked the batter in one pan as the recipe said, but next time I will do it in two pans, and I suggest that you do the same. The twist that I added was to crush some biscroff cookies and sprinkle them over the top of the batter before placing it in the oven. Serve warm or at room temperature, either way is really tasty!


This book has so many fun recipes, next up I think is the pumkin brea, cause I think its always pumpkin season!


Also this tiramisu looks really good, and the recipe is a tad bit simpler than the ones that I have used thus far! I'm a sucker for easy recipes :D


Go ahead, bake yourself a loaf, grab and slice and enjoy exploring Katrina's blog. The book can be found here on Amazon.


The Biscroff Double Chocolate Bread

Recipe Adapted from The Biscoff Cookie & Spread Cookbook 

Ingredients
1 1/4 cup all purpose flour
1 Tbsp baking powder
1 cup creamy Biscroff spread
2/3 cup sugar
2 eggs
1 tsp vanilla extract
1 cup milk
1 Tbsp cocoa powder
1 cup dark chocolate chips
1/2 cup crushed biscroff biscuits

Method
1. Preheat the oven to 325*F, Spray 2 8x4 inch loaf pans with baking spray.
2. Sift the flour and baking powder together and set aside.
3. In a large bowl using an electric mixture, cream the biscroff spread and sugar together until light and fluffy. Add in the eggs one at a time, then add the vanilla and milk.
4. Slowly add the dry ingredients to the wt mixture. Beat until just combined.
5. Remove 1 cup of batter and add the cocoa powder, once combined, fold in the chocolate chips.
6. Pour the batter into the prepared loaf, alterating between the 2 kinds of batter. Once all the batter is in the pan, run a butter knife through the pan in a figure 8 shape. Top with some crushed biscroff biscuits.
7. Bake for 50 mins or until a toothpick comes out clean.

Enjoy!
Farhana

Don't forget, caring is sharing!

Sparkle and Shine : Challenge 2

Did you know that I have an obcession with paper crafts. I love anything and everything to do with paper, stamping to die cutting, embossing to water coloring. So when I found out about card challenges out there, I was so amused and had to try my hand at it! Here is my second installment to the Sparkle and Shine Challenge. This time the inspiration was a sketch. 


Using that and my current obcession with embossing on kraft paper, I came up with this.


This card is pretty loaded. Embossing, fussy cutting, sequins, stamping, washi tape and paper. Let's not forget the twine!


There is plenty a dimension with the wreath raised with some foam tape, and the tag is also raised with foam tape.


Just another look, tried out mememto ink on kraft and loved it!

 Happy Crafting!
Farhana   

Don't forget, caring is sharing!

The Cricket Cookies

Yes, I watch cricket. Yes, "I am that brown". I needed to put that in quotes as I took the line from a thread that started with me and a friend discussion the game while Bangladesh and England were playing. That got me to thinking, I'm that brown, but I don't have a single cricket related post on my blog! Well, I did share this cupcake decorating idea on a while back, but that's about it!

So I got on the internet to get some ideas of what treat I could make to enjoy today's Bangladesh-India game, but everything seemed a little too elaborate as I have a final tomorrow and gave myself a 1 hour break to bake something up. I came up with some Bangladesh "flag" cookies and piped the rest of them to look kind of like cricket balls. I haven't seen the red cricket balls used in a while. Maybe they are used in test matches? Either way, I made these in an hour, so you can too!

Using a food processor allows you to use cold butter, which means that you don't have to chill the dough. Just chill the tray while the oven is preheating and you are rolling the cookies. Clean up while the cookies are baking and cool them on a wire rack to speed up the process. While they cool, get your chocolate melted and some sprinkles out.

I told you it was easy. Seriously took me longer to take the pictures, edit them and write this post! BTW I finally found use for my Christmas theme sprinkles!

The Cricket Cookies

Ingredients
1 batch Shortbread Cookie dough
green and red food color
white melting chocolate
sprinkles

Method
1. Preheat oven to 325*F and put a cookie sheet in the freezer.
2. Make the cookie batter and split the dough. Tint with green and red food color in two separate bowls.
3. Use circle cookie cutters to cut a bunch of donut shapes with the green food color, roll out the red dough, cut circles with the smaller cutter and place them inside the green donut. The dough expands as it bakes, so the two colors will attach themselves.
4. After all the green dough has been used, roll out the remaining red dough and cut circles with larger cookie cutter.
5. Bake for about 12-15 mins on the chilled cookie tray lined with parchment paper, until the cookie slides without breaking when pushed or the edges start to brown. The center will still be a little soft.
6. Cool on a wire rack.
7. Melt the white chocolate and pipe a stitched design on half the plain red cookies and for the remaining just create a zigzag pattern and top with sprinkles!

Enjoy!
Farhana

Don't forget, caring is sharing!

The Chocolate Chip Cookie Pie

Happy Pi Day! This is actually the most "Epic" Pie day because of the date, 3/14/15. I was wondering why I haven't heard for pi day till my move to America, well in British style today is 14/3/15 so it's impossible to get the 3rd day of the 14th month!


Most bloggers have been all about this day with fancy pies, I just have a really easy recipe with just a few crappy pictures. I thought that I was going to bake this again and take some more creative pictures, but I didn't get a chance to bake in time, but had to share this recipe with you, as its an amazing dessert!


When I say that this recipe is EASY, I'm not tricking you. Use store bought pie crust and throw the rest of the ingredients into a bowl, beat and pour and stick it in the oven. Done!!


So go ahead and get baking! There's still time to celebrate Pi day with this treat!


The Chocolate Chip Cookie Pie
Adapted from Nestle

Ingredients
1 unbaked pie crust (I use store bought!)
2 eggs
1/2 cup flour
1/2 cup granulated sugar
1/2 cup packed brown sugar
3/4 cup (1 1/2 sticks) butter, at room temperature
1 cup chocolate chips
1 cup walnuts
Vanilla Ice Cream (optional, but HIGHLY recommended)
Chocolate Syrup (also optional but HIGHLY recommended)

Method
1. Preheat oven to 325*F.
2. Beat your eggs in a large bowl until foamy.
3. Add in the flour and both the sugars. Continue beating.
4. Next add in the softened butter, continue beating.
5. Once well mixed fold (stir) in the chocolate chips and walnuts.
6. Unroll the pie crust in a pie pan. Spoon the prepared filling in the pie crust.
7. Bake for almost an hour (~55 mins) until the edges are golden brown and the center is almost solid.
8. Serve warm with scoop or two of ice cream, topped with a ton of syrup of course!

Enjoy!
Farhana

Don't forget, caring is sharing!

Throwback Thursday 5.0 : Spring Cupcakes

Its almost officially spring! But here in the PNW it has been feeling like spring for weeks now! I'm so glad that I didn't buy a new coat and boots this winter, cause I wouldn't have had a chance to wear them at all. But the downside was that I didn't get a chance to go snowboarding even once :(.


I am one week away from spring break!! And just like all my spring breaks thus far, this one is going to be great! I'm so excited that I am having the hardest time concentrating!! In the spirit of spring, today I am going to share some spring theme cakes and cupcakes.


The regular and mini cupcakes are regular vanilla and chocolate cupcakes piped with cream cheese icing tinted with pastel colors. I did not know about the gel food colors back then, I just the pastel set from the local grocery store.


The cake was a carrot cake, with the same cream cheese frosting tinted in only pink. I piped A LOT of rosettes using an open star. For the cupcakes I just went made a bunch of twirls and swirls with a round tip.


I didn't have a huge collection of icing tips, so all the tips are from a decorating set that I got from Bed, Bath and Beyond.


These are really simple, so give them a try and impress your guests at the next spring get together!

Enjoy!
Farhana
Don't forget, caring is sharing!

The Sprinkles Strawberry Cupcake

So my friend told me that adding freeze dried strawberries to macarons, I missed the word "dried" and ending up buying a bag of frozen strawberries. They hung out in the freezer for a while, but if you know me you probably know that stuffed freezers bug me. In an attempt to use them I went to my good friend Google for some help. And I came across a Sprinkles copycat recipe for strawberry cupcakes.


I'm glad I made my way to the kitchen to try the recipe. It really good, unfortunately the strawberry cupcake was sold out when I finally found my way to a Sprinkles bakery (more on that coming soon!). I've read some really complex recipes using fresh strawberries, so I'm glad that I made a mistake and got frozen strawberries, cause it lead me to making these really tasty cupcakes and now you can make them too! 


I also wanted to try and copy the look of Sprinkles cupcakes, but I didn't have the time to play with fondant. So I layered circle and heart sprinkles to try and create the look. 


The Sprinkles Strawberry Cupcakes

Adapted from Martha Stewart

Ingredients

for the cake
2/3 cup whole frozen strawberries, thawed
1 1/2 cups all-purpose flour, sifted
1 tsp baking powder
1/4 cup milk (any fat content)
1 tsp vanilla extract
1/2 cup (1 stick) unsalted butter at room temperature
1 cup white sugar
1 egg
2 egg whites

for the frosting 
1/2 cup whole frozen strawberries
1 cup (2 sticks) unsalted butter, at room temperature
3 1/2 cups powdered sugar
1/2 tsp vanilla extract

Method
for the cake
1. Preheat oven to 350*F and line a muffin tin.
2. Blend the strawberries, make sure that you have 1/3 cup puree. Add a few more strawberries if needed. Stir in milk and vanilla, set aside.
3. Cream the butter and sugar together. Once the mixture is a pale yellow color, add the egg and beat well. Then add the egg whites. and beat for a few minutes till the mixture is light and fluffy.
4. Reduce the speed of the mixer and add the rest of the dry ingredients, alternating with the strawberry mixture. Beat until just mixed.
5. Divide the batter into the lined muffin tin (I like to use a ice cream scoop) and bake for 20-25 mins depending on your oven, or until a toothpick comes out dry.
6. Cool the cupcakes on a wire rack, making the frosting in the meanwhile.

for the frosting 
7. Blend the strawberries to make a puree. Set aside.
8. Beat the butter until fluffy. Slowly add in the powdered sugar, 1/2 cup at a time.
9. Once the butter-sugar mixture is well combined, add in the vanilla extract and 3 Tbsp of strawberry puree, beat for about 30 seconds till combined, making sure not to over mix.
10. Once the cupcake are cool, pipe or spread the frosting on and top with sprinkles! (cause sprinkles make everything better!!)

Enjoy!
Farhana

Don't forget, caring is sharing!

Blogger View: Huma from Baked by H

Welcome back for another edition of BloggerView, this time I got to talk to Huma from Baked by H. She has amazing baking ideas AND takes really good pictures :) And then I find out that she has only been blogging a couple of months! I came across her pictures on Instagram, which lead me to her blog. And I'm glad that I meet her, her blog posts are a pleasure to read and she has similar baking style like me, so cannot wait to start trying recipes of her blog!

Enough chitchat, here's what Huma had to share :

1. How long have you been blogging?

Only about 4-5 months!

2. What made you start blogging?

I get asked for recipes a lot and I thought the best and easiest way to share them with everybody was via a blog. I've posted pictures of my bakes on instagram for a really long time and I got a lot of encouragement to start blogging from there as well. 

3. Do you remember your first blog post, if so what was it?

Oh definitely, it was vanilla cupcakes! I wanted these to be my first blog post because when I first started baking properly, it was these that got me a lot of attention

4. Do you blog full time or is it a hobby?

It's a hobby. I try and keep it regularly updated but it's sometimes difficult because I'm a full time law student

5. Who is your favorite blogger?

Ummm that's a tough one! Probably Averie Cooks or Sally's Baking Addiction 

6. What is your favorite social media?

Instagram!

7. What is your favorite baking tool?

I'm going through a doughnut tin phase at the minute...

8. What is your favorite season or holiday to blog about?

Christmas! 

9. Something that you can't live with out?

The internet 100%

10. Any words for new and aspiring bloggers?

Persevere through all the confusing coding language and your commitment to your blog will pay off! Nothing makes me happier than seeing different people all over the world enjoy my blog :)

Here's a list of my to bake list from her blog!


Enjoy!
Farhana

Don't forget, caring is sharing!

Sparkle and Shine : Challenge 1

Considering the amount of time that I spend in the blogger-sphere, I am really surprised that I hadn't heard on this crafting challenges till now! Now that I know, I thought I'd give this new Sparkle and Shine Challenge a try. Its sponsored by one of my favorite, local NW bloggers, Pretty Pink Posh. She is known as the Sequin Queen and I love her ideas, thanks to her blog I have actually started using all the sequins that I have been hoarding.

The inspiration for this challenge was as follows :


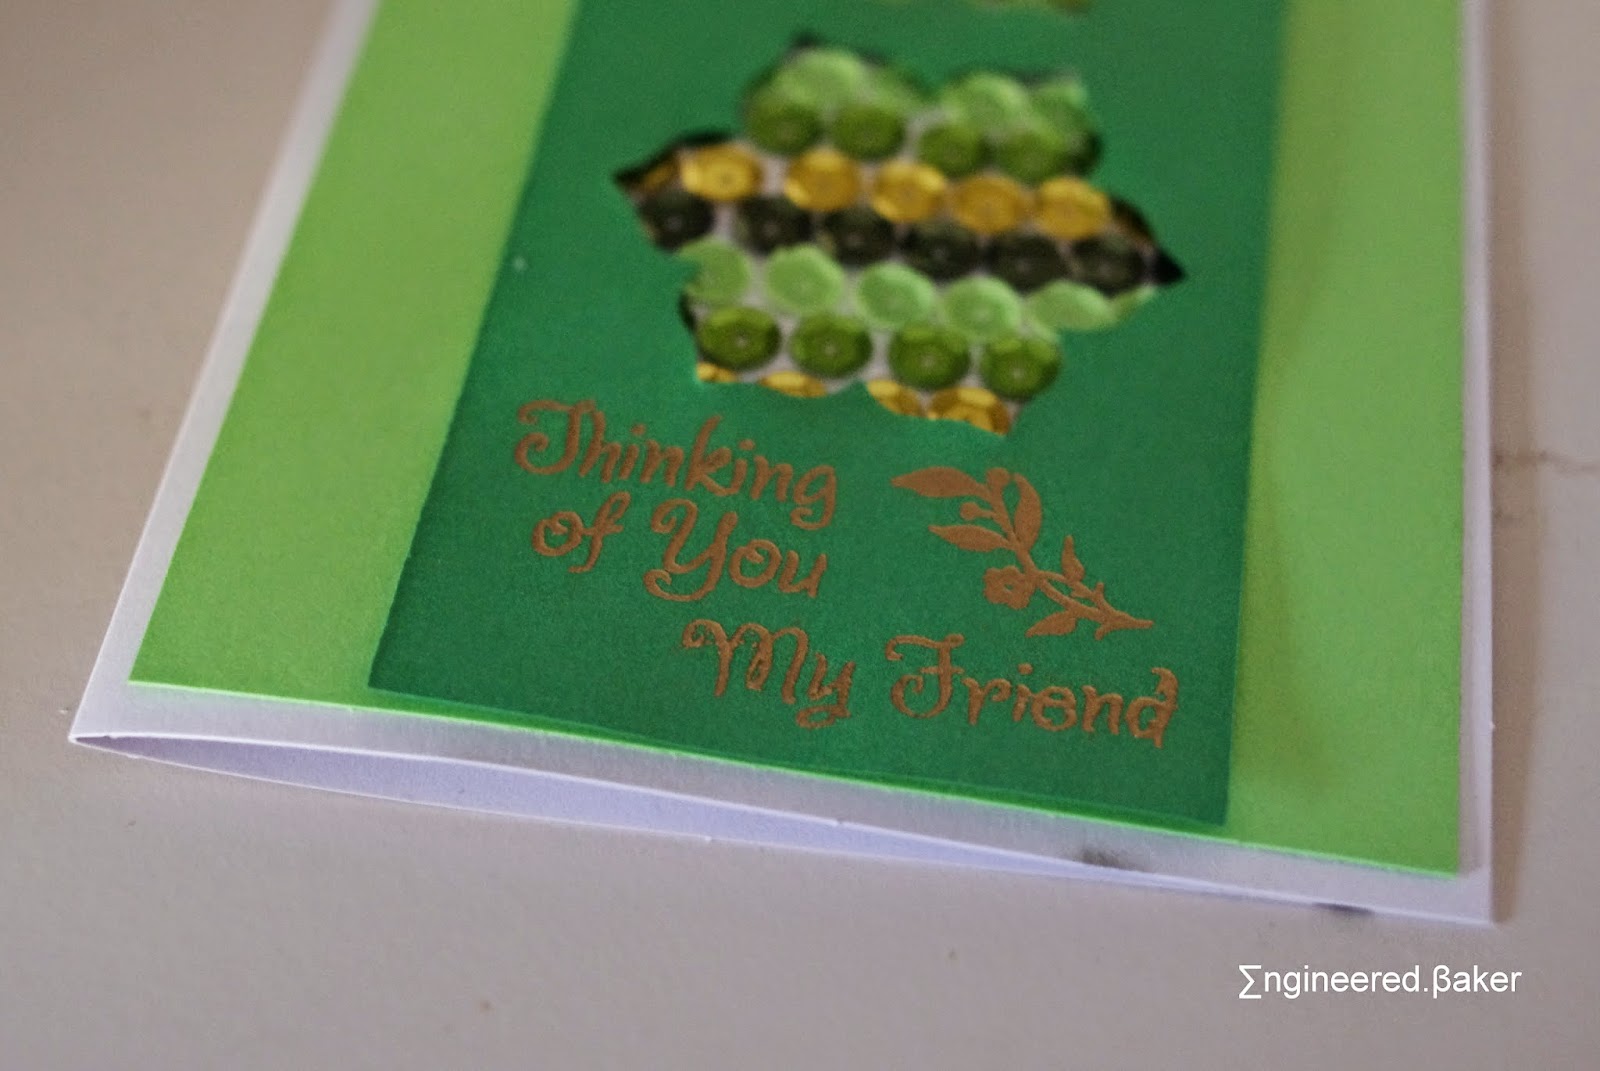
In an attempt to not go out and buy more products to hoard, I decided to work with that I already had, and came up with this.


And added a matching sentiment inside.


Just a little up close look.


 Happy Crafting!
Farhana   

Don't forget, caring is sharing!