So I've been on this high of posting regularly, but it's been a lot of crafting, fear not, I didn't forget about all my baker readers! As most of you remember a while back I shared my favorite cut out cookie recipe with a glimpse of a possible way to decorate them. Today I'll walk you though making a batch of royal icing.
Before we get started, I thought that I would share a few little things that I have learnt over the past few years about decorating cookies. I am not an expert and everything that I learnt is through trial and error. I did take a flow cookie decorating class a while back with a few friends at a local cake supply store, and learnt a few thing there too.

So, here's what you DON'T have to do or get to make royal icing:
1. You don't need to have a separate mixing bowl or mixer attachments. Just make sure that they are well washed and wiped dry.
2. You don't have to buy the fancy, expensive meringue powder, Wilton brand work perfectly for me.
3. You don't need to splurge on $3 icing nozzles/tips, and their decorating bags are great , just use the Wilton brand.

What you should DO is watch/read this links before getting started, I saw no point in me describing what's already out there on the internet (it would be like reinventing the wheel):
1. Cut down clean up time by using this technique from Karen's Cookies, watch here.
2. Check out a 101 from Bridget of bakeat350, here.
3. Lastly check out SweetSugarBelle, she is the queen of cookies, literally!

Now, here's my recipe.
Royal Icing
Adapted from Joy of Baking
Ingredients
2 cups icing/powdered sugar, sifted
1 1/2 Tbsp Wilton meringue powder
1/2 tsp vanilla extract
1/4 - 1/2 cup water
Extra tools:
cling wrap
airtight container, for storing
gel food color
icing bag and tips
Method
1. Add sifted sugar and meringue powder to the bowl of electric beater. Mix for 30 secs.
2. Add in 1/4 cup of water, beat until well mixed. The mixture will be dull and very thin in consistency.
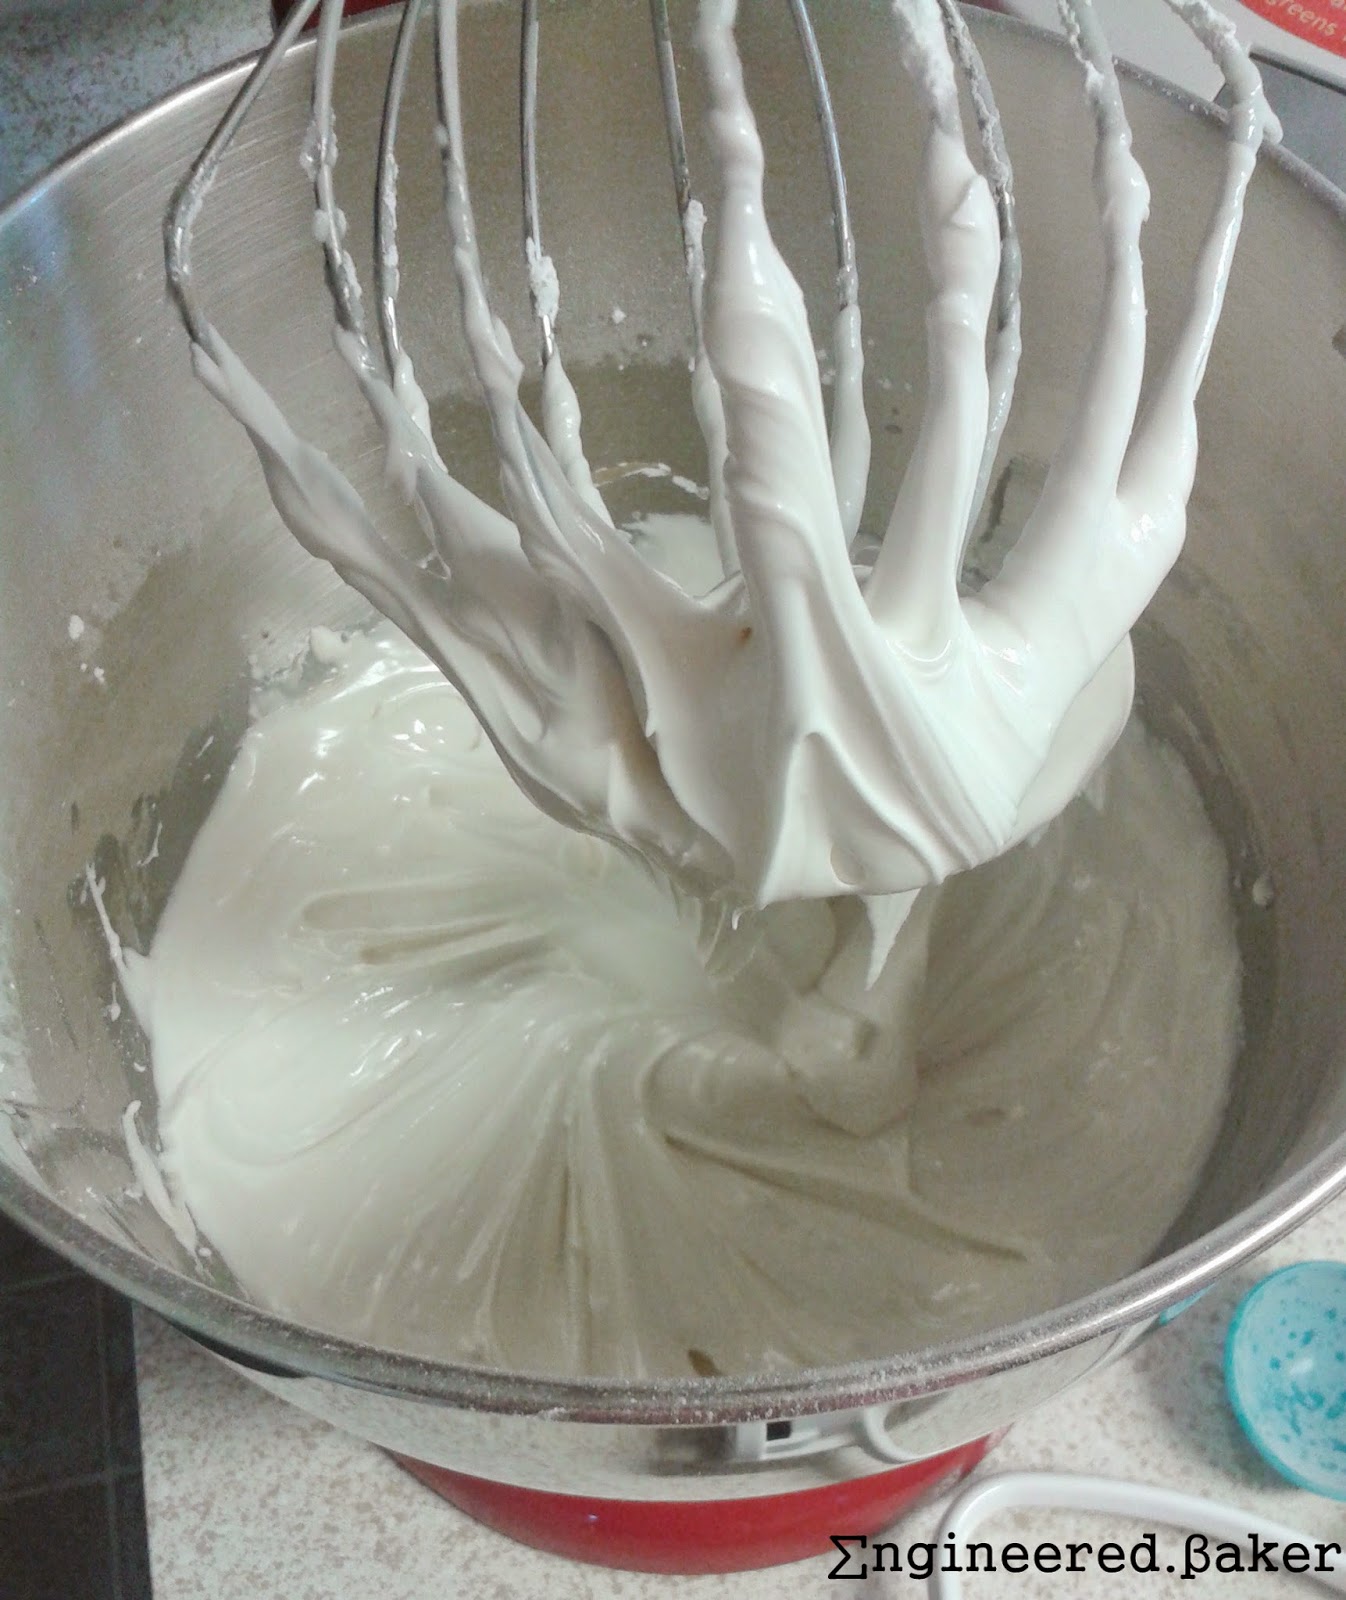
3. Continue to beat on medium high until the mixture is stiff and glossy. (Just like stiff beaten egg whites, the royal icing will hold peaks.)
4. Fold in the vanilla extract.
5. At this point the icing will be very thick.
6. Transfer the icing to an air tight container and cover with cling wrap, stores in a fridge for weeks.
OR
7. If you want to decorate the cookies as shown above, add color of your choice to a small batch of the icing. Then thin the icing down to "piping" consistency.
8. Fill a icing bag set with a Wilton #3 icing tip.
9. Pipe away and add a few silver sprinkles of detail.
10. Allow the cookies to dry for 2-3 hours before packing or serving.
(I know snowflake cookies in summer!?! Well with the FROZEN craze going on, these might just be the perfect addition to your party!)
Farhana
Before we get started, I thought that I would share a few little things that I have learnt over the past few years about decorating cookies. I am not an expert and everything that I learnt is through trial and error. I did take a flow cookie decorating class a while back with a few friends at a local cake supply store, and learnt a few thing there too.
So, here's what you DON'T have to do or get to make royal icing:
1. You don't need to have a separate mixing bowl or mixer attachments. Just make sure that they are well washed and wiped dry.
2. You don't have to buy the fancy, expensive meringue powder, Wilton brand work perfectly for me.
3. You don't need to splurge on $3 icing nozzles/tips, and their decorating bags are great , just use the Wilton brand.
What you should DO is watch/read this links before getting started, I saw no point in me describing what's already out there on the internet (it would be like reinventing the wheel):
1. Cut down clean up time by using this technique from Karen's Cookies, watch here.
2. Check out a 101 from Bridget of bakeat350, here.
3. Lastly check out SweetSugarBelle, she is the queen of cookies, literally!
Now, here's my recipe.
Royal Icing
Adapted from Joy of Baking
Ingredients
2 cups icing/powdered sugar, sifted
1 1/2 Tbsp Wilton meringue powder
1/2 tsp vanilla extract
1/4 - 1/2 cup water
Extra tools:
cling wrap
airtight container, for storing
gel food color
icing bag and tips
Method
1. Add sifted sugar and meringue powder to the bowl of electric beater. Mix for 30 secs.
2. Add in 1/4 cup of water, beat until well mixed. The mixture will be dull and very thin in consistency.
3. Continue to beat on medium high until the mixture is stiff and glossy. (Just like stiff beaten egg whites, the royal icing will hold peaks.)
4. Fold in the vanilla extract.
5. At this point the icing will be very thick.
6. Transfer the icing to an air tight container and cover with cling wrap, stores in a fridge for weeks.
OR
7. If you want to decorate the cookies as shown above, add color of your choice to a small batch of the icing. Then thin the icing down to "piping" consistency.
8. Fill a icing bag set with a Wilton #3 icing tip.
9. Pipe away and add a few silver sprinkles of detail.
10. Allow the cookies to dry for 2-3 hours before packing or serving.
(I know snowflake cookies in summer!?! Well with the FROZEN craze going on, these might just be the perfect addition to your party!)
Enjoy!
No comments:
Post a Comment
Thanks for reading my blog!