Post number 25! I really need to blog more consistently :) I had this card made and pictures taken to be posted in time for father's day, but then life happened and I never got around to editing the pictures. But I did have sometime to finally get to the pictures and the good news is that you can can make it for a birthday too :)

I personally find making cards for men and boys is harder than girls, so I was really excited to see this design on pinterest.
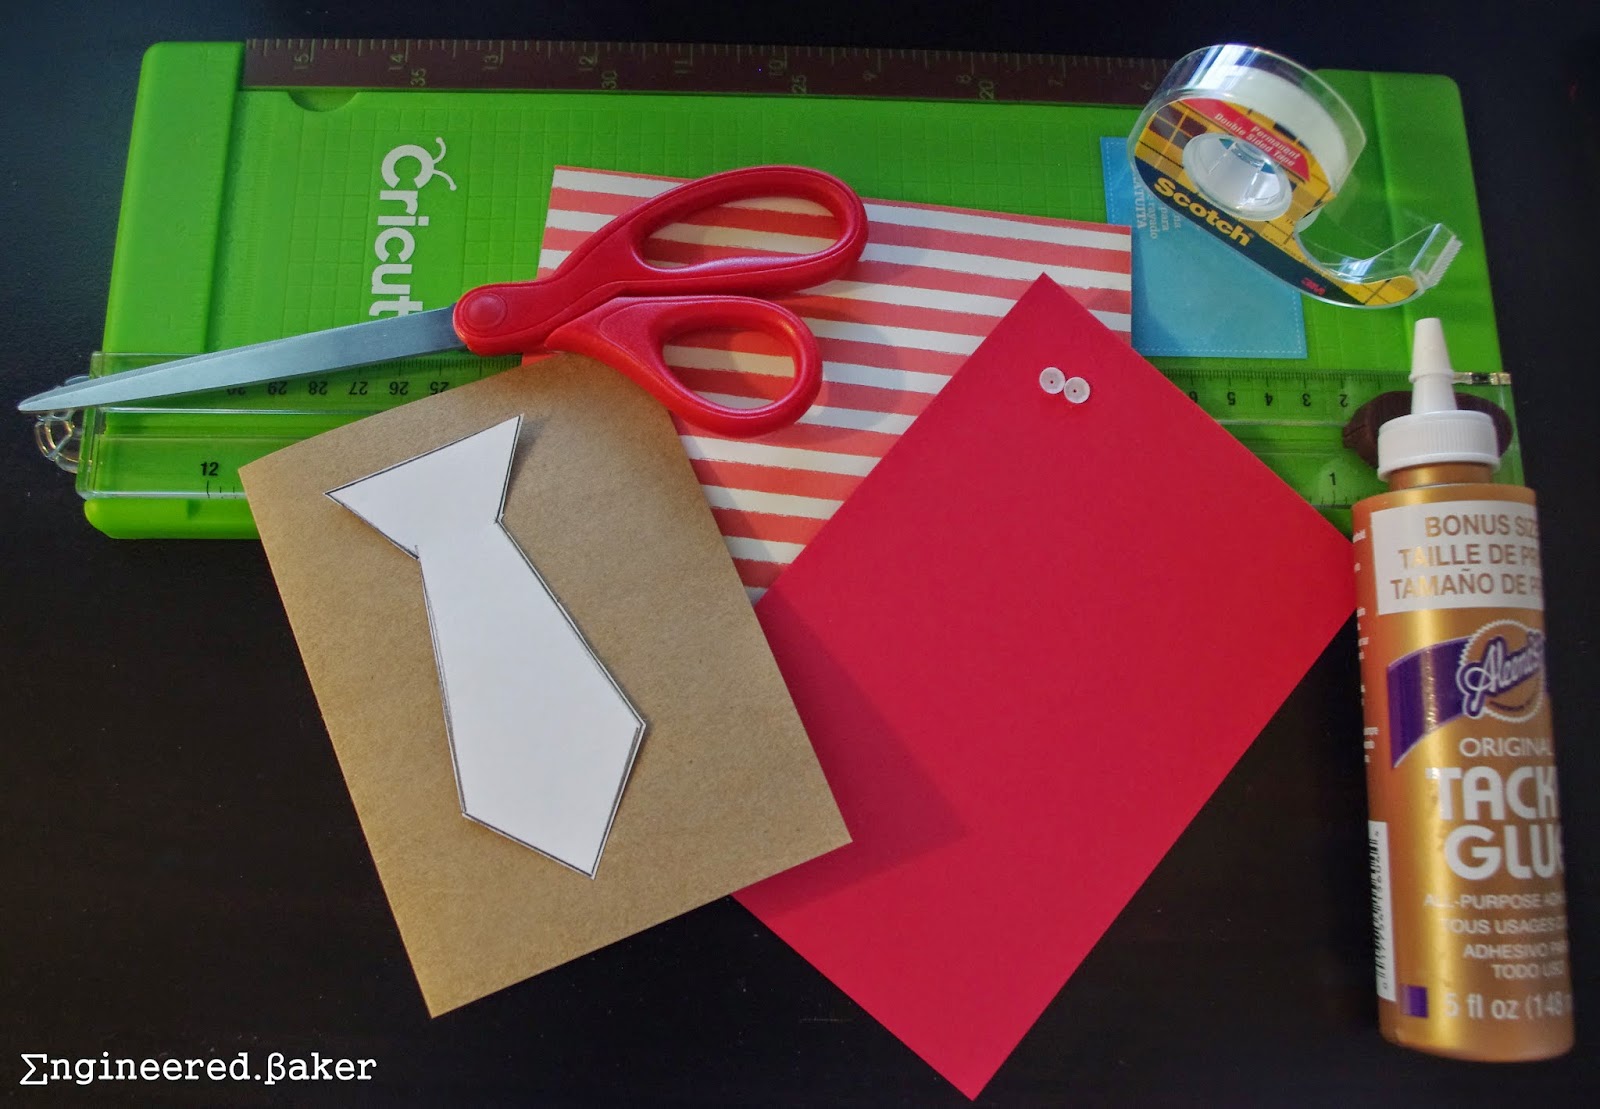
What you need:
- Kraft (5.5x4 inch) card
- stripped 6x6 sheet of paper, mine is from the My Mind's Eye
- plain cardstock that matches the striped paper
- tie template
- sequins
- glue
- paper trimmer
- scissors
- double sided tape
What to do:
1. Trim the stripped cardstock down to the size of the card. Turn it over and place the tie template in the center of the sized cardstock. Draw a line from the edge to the start of the tie, in the center of the cardstock.

2. Cut along the line drawn in step (1) and fold over from the top corners of the page to create the "collar".

3. Cut the folded triangles off. Use the cut pieces as templates and cut two triangles to create the "collars".

4. Trace the tie template on to the plain card stock and cut it out, using double sided tape attach the "shirt" to the card, then stick the "tie" on top.

5. Using glue attach the cut collars to the shirt (on top of the collar).

6. Add the "buttons" using sequins.

7. Write in a message inside and your card is ready to send out.
I personally find making cards for men and boys is harder than girls, so I was really excited to see this design on pinterest.
What you need:
- Kraft (5.5x4 inch) card
- stripped 6x6 sheet of paper, mine is from the My Mind's Eye
- plain cardstock that matches the striped paper
- tie template
- sequins
- glue
- paper trimmer
- scissors
- double sided tape
What to do:
1. Trim the stripped cardstock down to the size of the card. Turn it over and place the tie template in the center of the sized cardstock. Draw a line from the edge to the start of the tie, in the center of the cardstock.
2. Cut along the line drawn in step (1) and fold over from the top corners of the page to create the "collar".
3. Cut the folded triangles off. Use the cut pieces as templates and cut two triangles to create the "collars".
4. Trace the tie template on to the plain card stock and cut it out, using double sided tape attach the "shirt" to the card, then stick the "tie" on top.
5. Using glue attach the cut collars to the shirt (on top of the collar).
6. Add the "buttons" using sequins.
7. Write in a message inside and your card is ready to send out.
Happy Crafting!
Farhana
Cute card :)
ReplyDeleteThanks!!
Delete